Creating JAR file in maven
To create first project in maven, I used the maven "archetype" mechanism. In maven, archetype is a template of a project.
To create a quick start maven project, execute the following command in Command prompt.
mvn archetype:generate -DgroupId=org.yarlithub.yschool -DartifactId=yschool-mini-mayooapp
Here,
groupId :This is an element that indicates the unique identifier of the Organization that created the project. groudId should follow the package name (reversed DNS of your website)
artifactId :This also is an element that indicates the unique base name of the project.
-D: This command is simply setting Java system properties, this use passing configuration information to Maven.
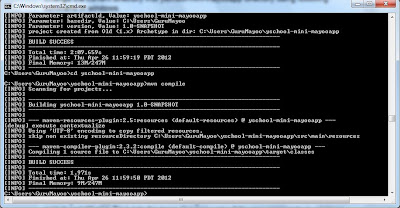
When executed the above command, a directory named "yschool-mini-mayooapp" has been created for this project. After that the project should be compiled.
Change the current directory into yschool-mini-mayooapp directory using following command in windows.
> cd yschool-mini-mayooapp
If you want to add this JAR into another WAR file you can edit this App.java file
For example: If you want to print the current time use the following code.
public class App{
public static String myDate(){
return new java.util.Date().toString();
}
}
Then the application sources are compiled using following commands
>yschool-mini-mayooapp>mvn compile
By executing the mvn install command, Maven finishes by installing the JAR file into the local repository, making this JAR file available to other projects.
>yschool-mini-mayooapp>mvn install
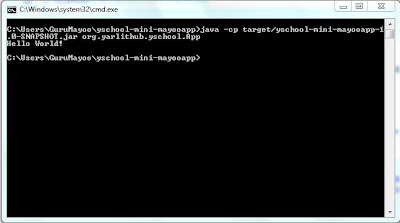
Then to see the out of this project execute the following commands
>yschool-mini-mayooapp>java -cp target/yschool-mini-mayooapp-1.0-SNAPSHOT.jar org.yarlithub.yschool.App
Creating WAR file in maven
Creating a web application in maven is straight forward like above mentioned, but different archetypeArtifactId. Back into the base directory using following commands in windows
>yschool-mini-mayooapp>cd..
After that execute the following command then a web application will be created.
>mvn archetype:generate -DarchetypeArtifactId=maven-archetype-webapp -DgroupId=org.yarlithub.yschool -DartifactId=yschool-mini-mayoowebapp
After creating web application, this project must be compiled. Before compilation, If you want add JAR file into WAR file you should add a dependency into the WAR pom.xml
<dependency>
<groupId> org.yarlithub.yschool</groupId>
<artifactId> yschool-mini-mayooapp</artifactId>
<version>1.0-SNAPSHOT</version>
</dependency>
Then Edit the index.jsp file in web application
<html>
<body>
<h2>Hello Jaffna!</h2>
<h3>Yarl IT Hub<h3>
<p>Is a community who live the shared dream of making Yarl the next Sillicon Valley. We are a not for profit initiative and 100% apolitical. An initiative by the community for the community!</p>
<h3>Now the Time is: <%= org.yarlithub.yschool.App.myDate() %>
</body>
</html>
To compile this project, go to project folder type "yschool-mini-mayoowebapp" using "cd yschool-mini-mayoowebapp" command, and then type the following commands.
>mvn compile
Simply executing the command mvn package creates our WAR file
>mvn package
To run this application we simply add the jetty plug-in to pom.xml for this web application. This following code will be added to the pom.xml
<build>
<finalName>yschool-mini-mayoowebapp</finalName>
<plugins>
<plugin>
<groupId>org.mortbay.jetty</groupId>
<artifactId>maven-jetty-plugin</artifactId>
<version>6.1.10</version>
<!--<configuration>-->
<!--<scanIntervalSeconds>10</scanIntervalSeconds>-->
<!--<stopKey>stop</stopKey>-->
<!--<stopPort>9999</stopPort>-->
<!--</configuration>-->
<executions>
<execution>
<id>start-jetty</id>
<phase>deploy</phase>
<goals>
<goal>run</goal>
</goals>
<configuration>
<scanIntervalSeconds>0</scanIntervalSeconds>
<daemon>true</daemon>
</configuration>
</execution>
</executions>
</plugin>
</plugins>
</build>
We can now run our web application by simply typing the command as shown below.
>mvn install jetty:run
We can now open our web browser to localhost:8080/ yschool-mini-mayoowebapp to see our web application.


